 (click for larger image)
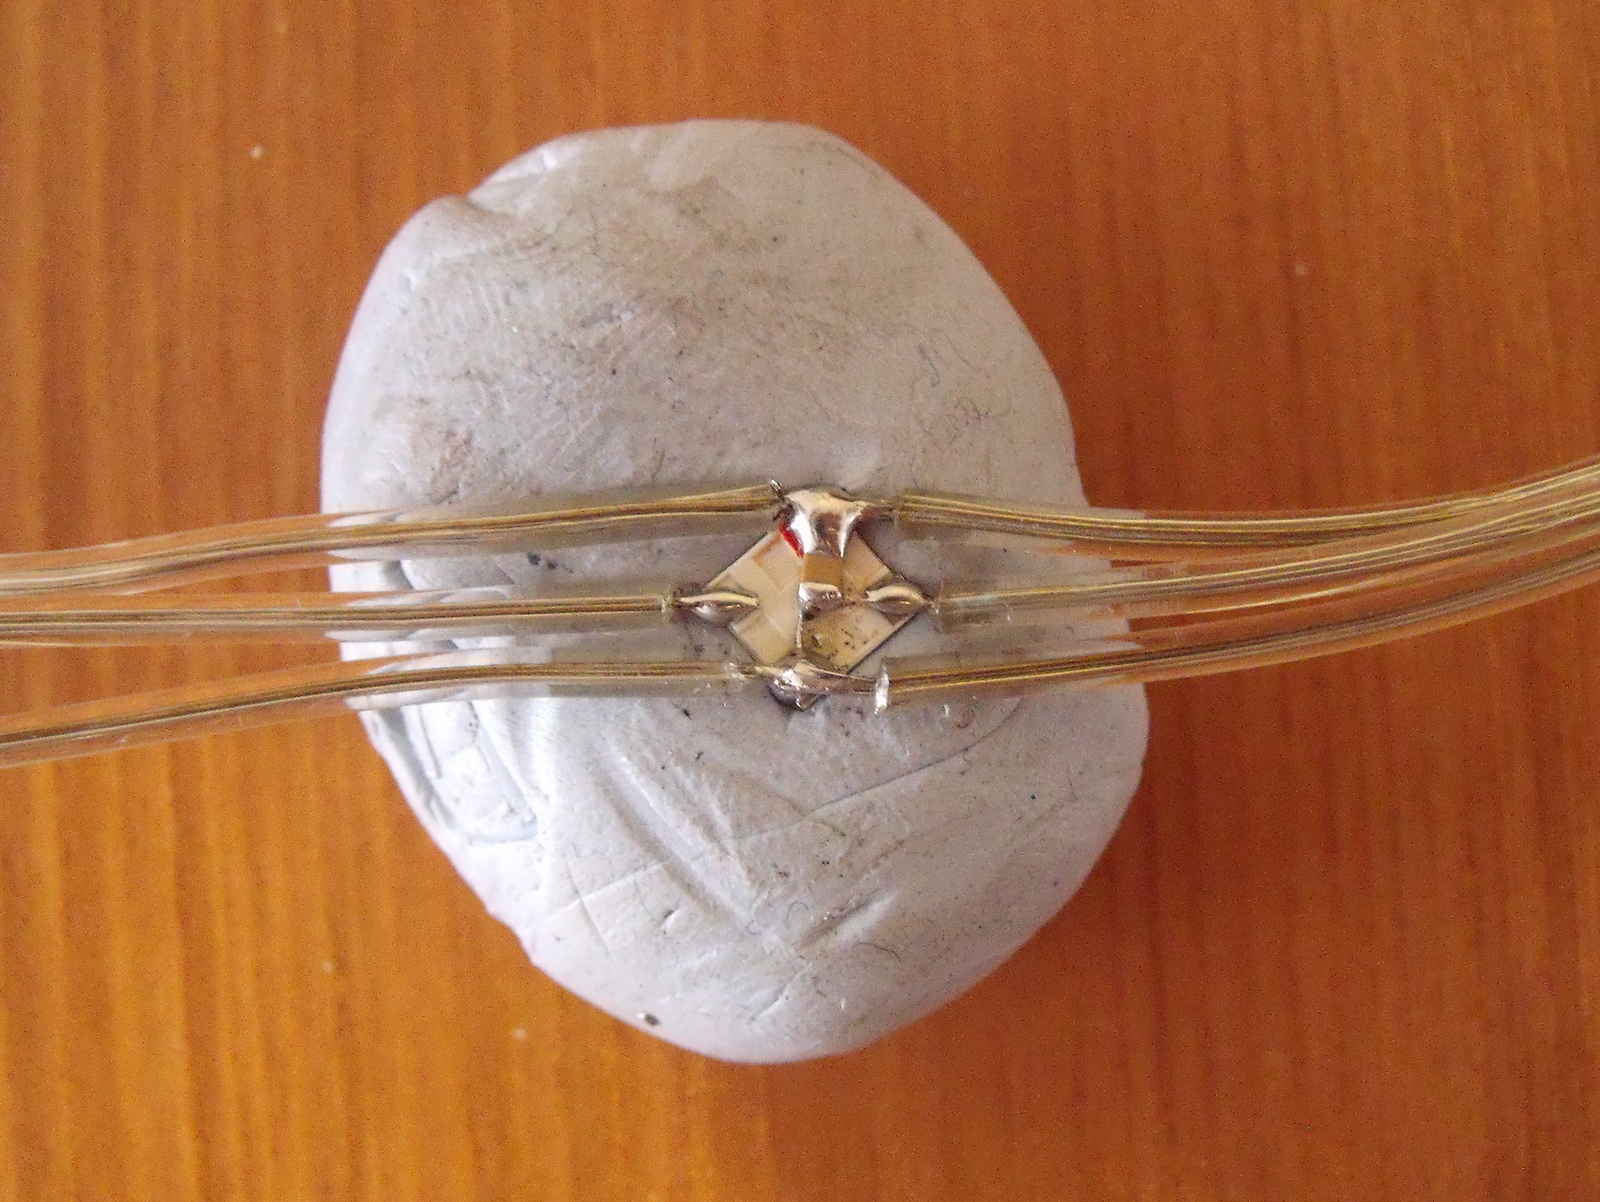 (click for larger image)
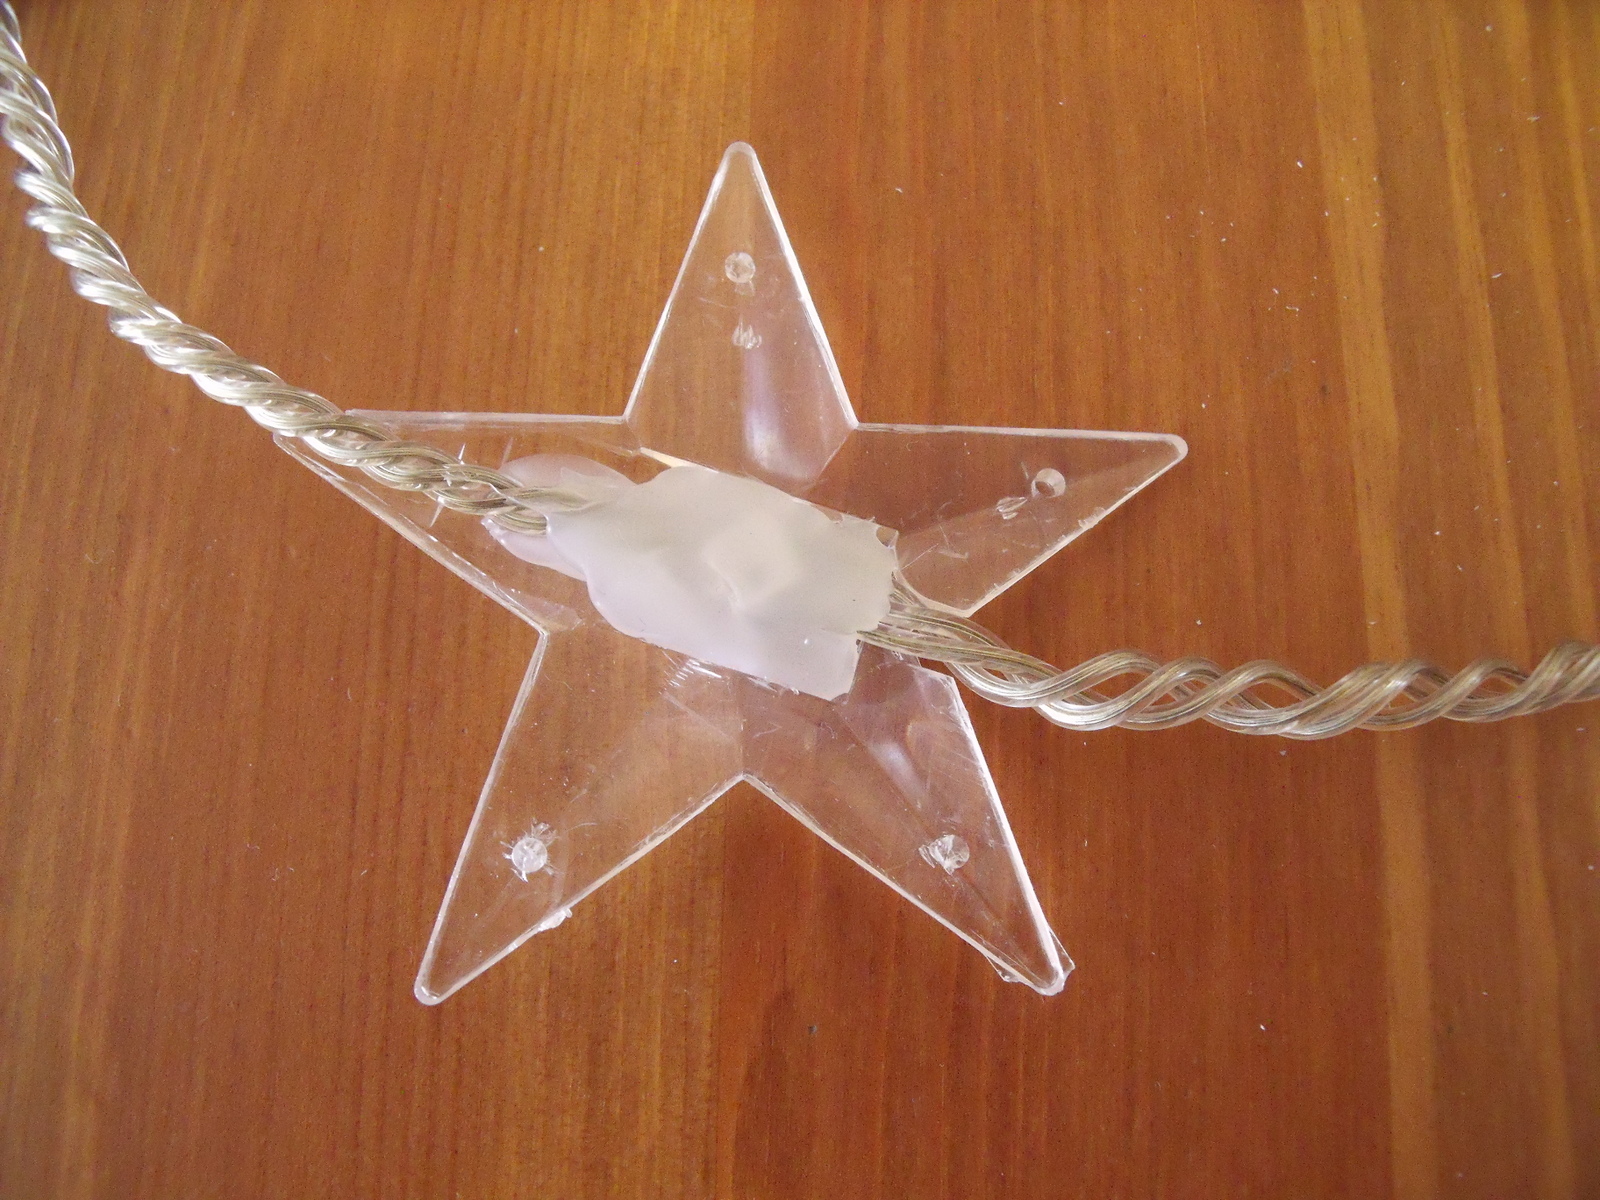 (click for larger image)
 (click for larger image)
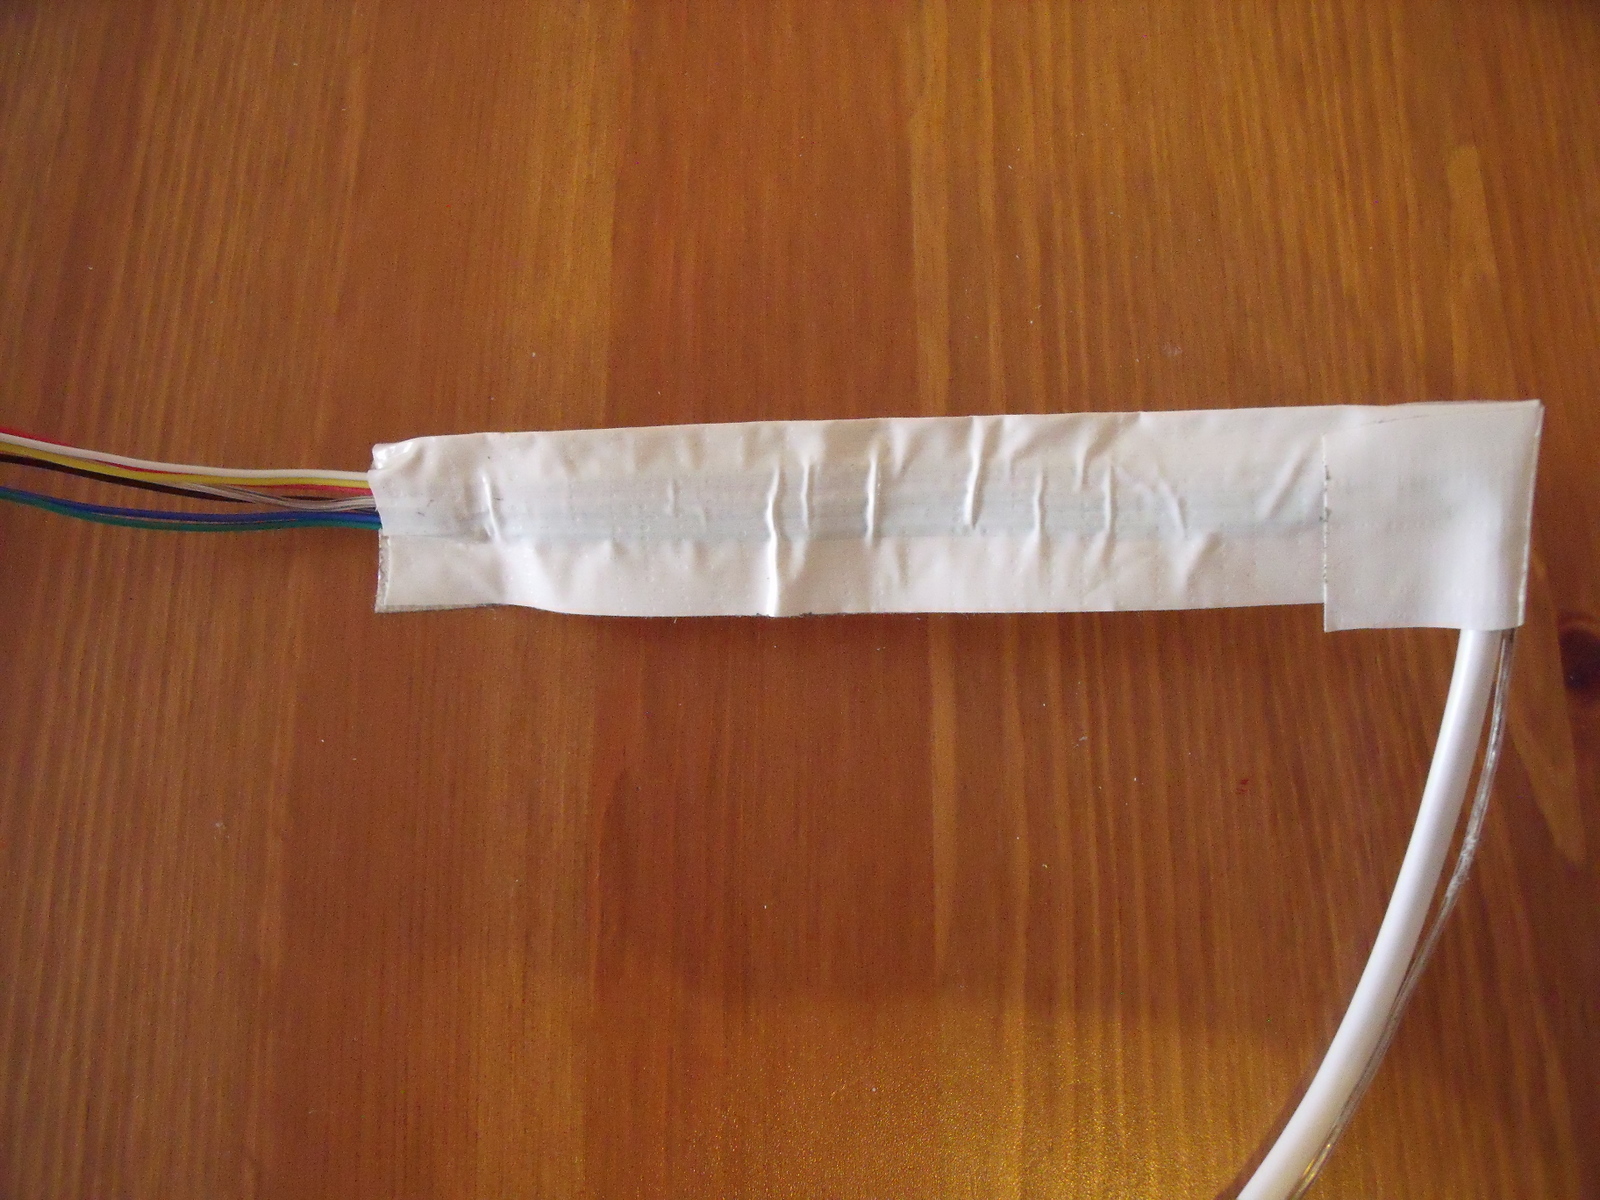 (click for larger image)
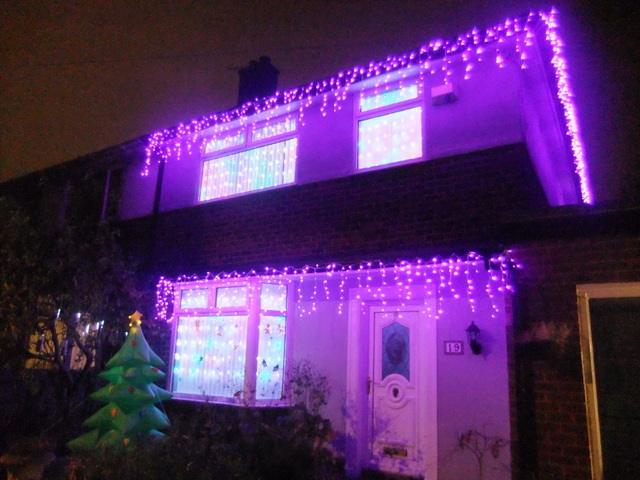
Pixel curtain lights
There curtain lights were originally colour changing star lights from B&M which had been used in our static display for a few years (see here). It seemed like a good idea to hack them up and re-use the plastic stars and the wires for my new curtain lights. Big mistake! This took much longer than I thought.
In fact if you are new to this hobby, be warned, everything takes much longer than you may think - or maybe it's just me!
The diagram to the left shows the basic idea I was after. The spacing between each led would be altered depending on the dimensions of each window.
The idea of soldering an 0805 capacitor to the back of each led and then wiring these together is used on a number of my lighting elements. Use blu-tack as another set of hands, very handy for securing the first set of wires whilst you solder the second set. Another time consuming task!
The finished led is hot glued into each star. The glue not only secures the led in place but also strengthens the wire joints and diffuses the light.
The fourth image is a close-up of how the power is tapped off the twin core cable and sent down each chain of leds. I used 42 strand cable for the small window and 79 strand cable for the 3 larger windows.
The last image is the method I devised to pass power and data through the window because all other elements, the controller and the power supplies are on the outside. I used 6 core alarm cable and held the wires flat with duck tape to form a ribbon cable. As the lounge window has 126 leds I used 2 sets of alarm (ribbon) cable. Voltage drop is not a big issue as these ribbons only need to be 20cm long. This could then easily pass through an opening window but is thin enough for the double glazed window to shut tight.
