 (click for larger image)
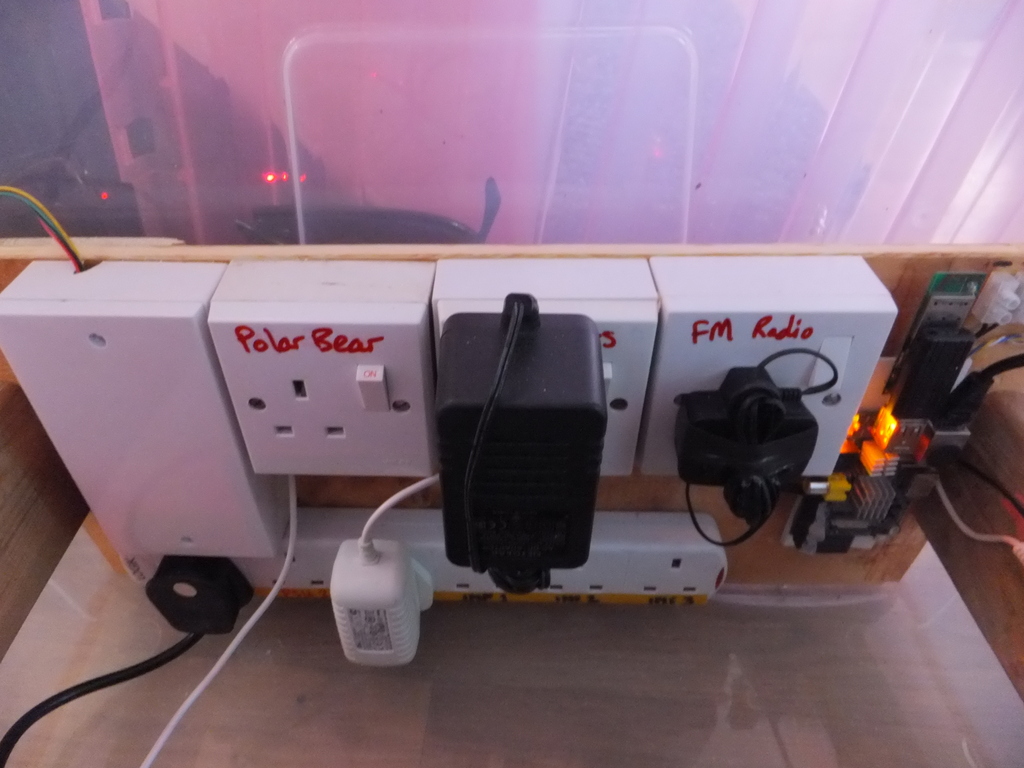 (click for larger image)
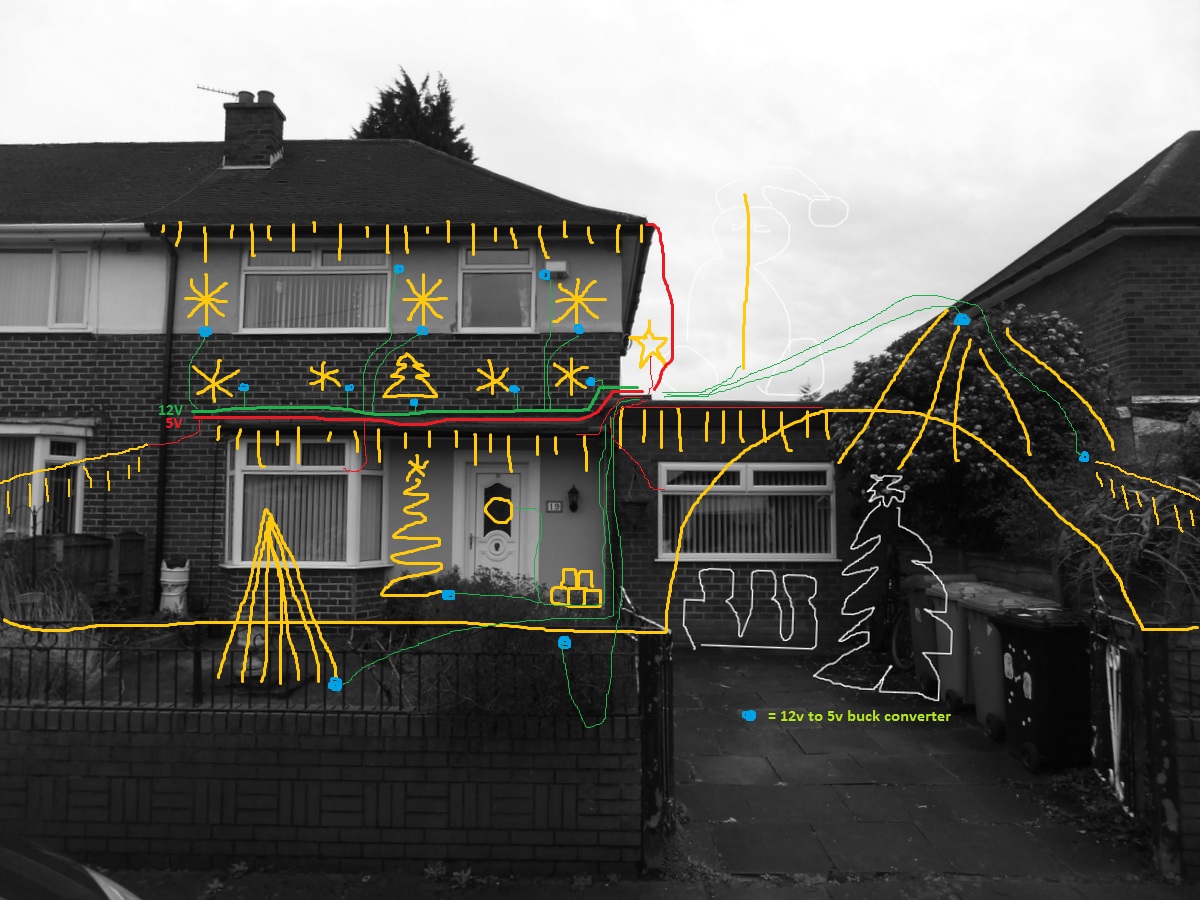 (click for larger image)
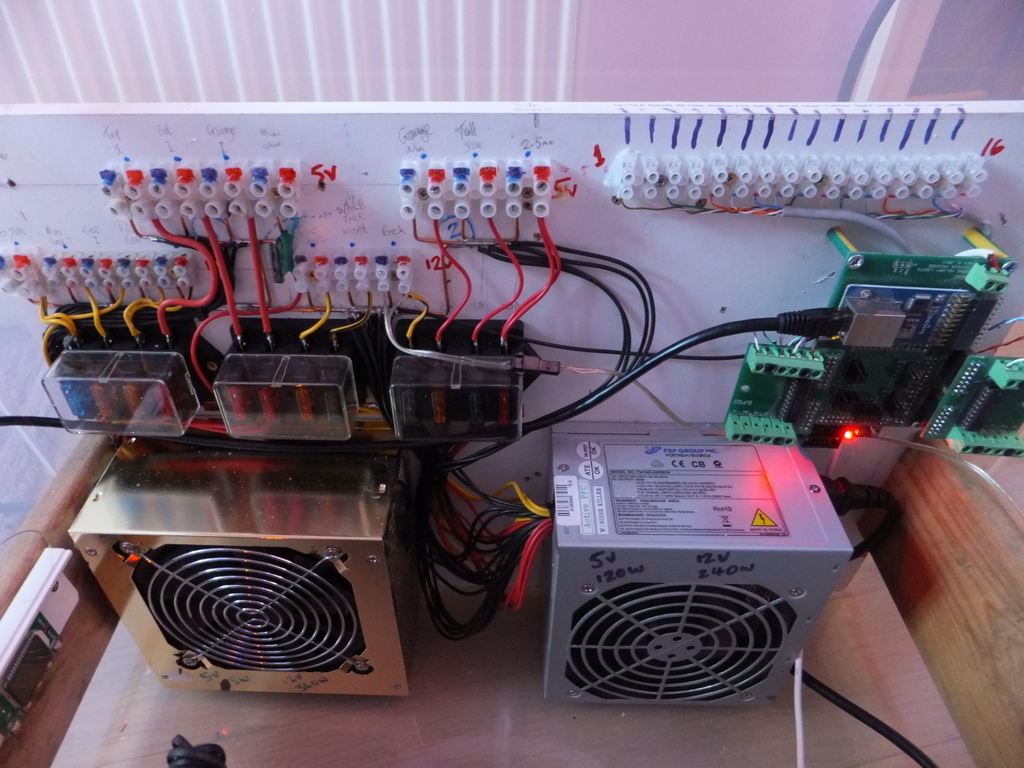
Power supplies / controller Mk2
It's still ugly but slightly more functional! (than 2015)
With more pixels comes the need for more power, therefore for 2016 I used a 400W and a 500W PC power supply as can be seen in the first picture. I also added fuses to each output. There is also the RonP 16 universe pixel controller that I used in 2015. To the left you can also see the low power FM transmitter which plays the music at the same time as the PC speakers which are setup at the front fence.
Image 2 shows the other half of my controller setup. The Raspberry Pi controls relays to power-up different sections of the mains sockets. The PSUs, FM radio/speakers and the inflatables can all be remotely controlled via the FPP. Another relay controlls the polar bear inflatable on the roof so that it can be remotely turned off in high winds.
This box of bits is basically all that is needed to power the whole show. This is placed in a weatherproof box on my garage roof.
Practically everything in 2015 was run on 5v from the 2 PC power supplies. However to make more use of these supplies, a lot more power comes from the 12v rails and then dropped to 5v via individual buck converters. Most of the light elements are powered from a single run of 6mm twin-and-earth for 12v and 2.5mm twin-and-earth for 5v. The high quality graphic in image 3 shows the idea - the red line is the 2.5mm T&E (5v) and 6mm T&E (12v) with lines coming off for power to each element.
